How to Check and Replace Your Tractor’s Battery for Reliable Starts
A reliable tractor battery is crucial for ensuring smooth operations on the farm. A failing battery can lead to slow starts, or worse, leave your tractor completely inoperable when you need it the most. This article will walk you through how to check for signs of a failing tractor battery, test it, and replace it if necessary. We’ll also provide battery maintenance tips to help you avoid future issues.
By the end of this guide, you’ll have a clear understanding of how to keep your tractor battery in top shape, ensuring your equipment starts up reliably every time.
Signs of a Failing Tractor Battery

Knowing when your tractor’s battery is nearing the end of its life can save you from unexpected breakdowns. Here are the most common signs that indicate your battery might need replacing:
-
Slow Engine Crank
If your tractor takes longer to start or if the engine cranks more slowly than usual, it could be a sign that your battery is losing power.
-
Dim or Flickering Lights
If your headlights or dashboard lights appear dim or flicker, this could indicate that your battery isn’t providing enough voltage to power the electrical components.
-
Clicking Sound on Start
A clicking sound when you turn the key is often a sign that the battery doesn’t have enough charge to start the engine.
-
Battery Warning Light
Many modern tractors have a battery warning light that will illuminate if there is a problem with the battery or charging system.
-
Corrosion Around Battery Terminals
If you see a white, ashy substance around the battery terminals, it’s a sign of corrosion. This can lead to poor connections and reduce battery performance.
-
Frequent Jump-Starts
If you find yourself frequently jump-starting your tractor, it’s time to replace the battery.
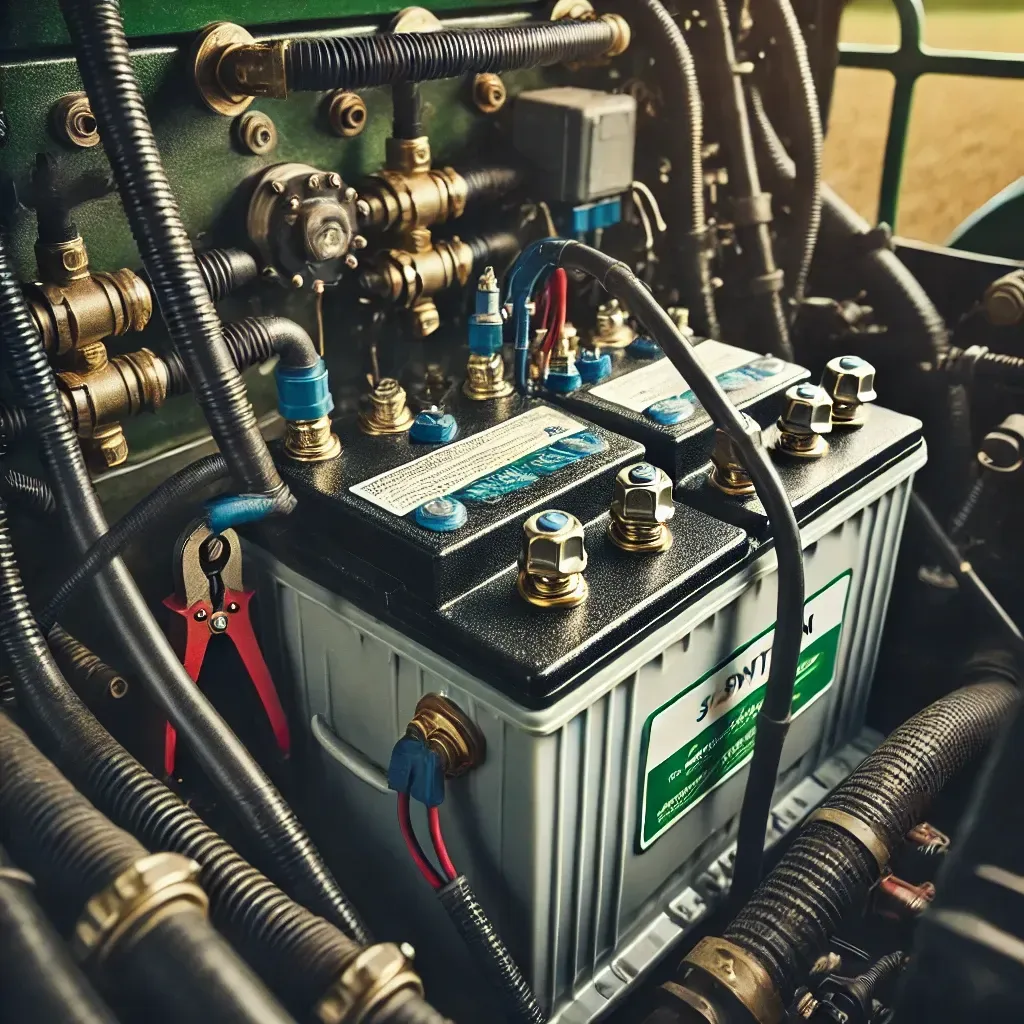
Step-by-Step Guide: How to Test and Replace Your Tractor Battery

Checking and replacing a tractor battery is a straightforward process. Follow these steps to ensure your tractor is equipped with a reliable power source.
Step 1: Gather Your Tools
Before you begin, make sure you have the following items:
- Voltmeter or multimeter
- Wrench or socket set
- Gloves and safety glasses
- New tractor battery (refer to your tractor’s manual for the correct type)
Step 2: Testing Your Tractor Battery
Testing your battery helps you determine whether it needs replacement. Here's how to do it:
- Turn Off the Tractor - Make sure your tractor is off before testing the battery to avoid any potential safety issues.
- Set Your Voltmeter - Set your voltmeter or multimeter to DC voltage and ensure it's set to a range that can read at least 20 volts.
- Test the Battery - Place the red (positive) probe on the positive terminal and the black (negative) probe on the negative terminal. A healthy tractor battery should read between 12.4 and 12.6 volts. Anything below 12.4 volts indicates the battery is losing charge, and below 12 volts means it’s time for a replacement.
- Test While Starting - Another test is to measure the voltage while starting the tractor. The voltage should not drop below 10 volts. If it does, the battery is weak and should be replaced.
Step 3: Removing the Old Battery
If your test indicates the battery needs replacing, follow these steps to safely remove it:
- Turn Off the Engine - Ensure the tractor is off and the keys are removed from the ignition.
- Disconnect the Negative Terminal - Always disconnect the negative (black) terminal first. This prevents any accidental electrical short circuits. Use a wrench to loosen the nut on the negative terminal and carefully remove the cable.
- Disconnect the Positive Terminal - Next, disconnect the positive (red) terminal in the same manner.
- Remove the Battery Hold-Down Clamp - Some tractors have a clamp or strap that holds the battery in place. Use a wrench to remove the bolts or release the clamp.
- Lift the Battery Out - Carefully lift the battery out of its compartment. Batteries can be heavy, so make sure to use proper lifting techniques.
Step 4: Installing the New Battery
Now that the old battery is removed, you can install the new one by following these steps:
- Clean the Terminals - Before installing the new battery, clean the battery terminals and connectors using a wire brush to remove any corrosion.
- Place the New Battery - Position the new battery in the compartment, ensuring it sits securely in place.
- Reconnect the Positive Terminal - Start by connecting the positive (red) terminal first. Tighten the nut securely with a wrench.
- Reconnect the Negative Terminal - Next, connect the negative (black) terminal and tighten it securely.
- Secure the Battery - If your tractor has a hold-down clamp, reattach it to ensure the battery stays in place during operation.
- Test the New Battery - Start the tractor to test if the new battery is working properly. The engine should crank smoothly, and the lights should be bright.
Battery Maintenance Tips to Prevent Future Issues
Keeping your tractor’s battery in good condition requires regular maintenance. Here are some tips to extend its life and ensure reliable performance:
- Clean the Terminals Regularly - Corrosion around the battery terminals can lead to poor connections and reduced performance. Clean the terminals with a mixture of baking soda and water to neutralize any acid buildup.
- Check the Battery Charge - Periodically check the battery voltage using a voltmeter to ensure it’s holding a charge. Keeping the charge above 12.4 volts will help extend its life.
- Secure the Battery - Make sure the battery is securely fastened in its compartment. Vibration from rough terrain can loosen the battery and cause damage to the internal components.
- Avoid Draining the Battery - Don’t leave the tractor’s lights or electrical components on when the engine is off, as this can drain the battery unnecessarily.
- Store the Battery Properly During the Off-Season - If you don’t plan on using your tractor during the winter, remove the battery and store it in a cool, dry place. Consider using a trickle charger to maintain the battery’s charge during storage.
Why Choosing the Right Battery Matters
When it comes to replacing your tractor’s battery, it’s important to choose the correct one for your specific model. Not all batteries are the same, and using the wrong one can result in poor performance or even damage to your electrical system.
Here’s why selecting the right battery matters:
- Correct Voltage and Amperage: Tractor batteries come in different voltages and amperage ratings. Always refer to your owner’s manual to ensure the new battery meets the specifications of your tractor.
- Cold Cranking Amps (CCA): This measures the battery’s ability to start the engine in cold weather. For tractors that operate in colder climates, choosing a battery with a higher CCA rating is essential.
- Size and Fit: Make sure the battery physically fits in the compartment. A loose or improperly sized battery can cause damage due to vibrations.
Conclusion: Ensure Reliable Starts with Proper Battery Maintenance
Your tractor’s battery is the heart of its electrical system, and keeping it in good condition is essential for reliable starts and smooth operation. By regularly checking, maintaining, and replacing your battery when needed, you can avoid unexpected breakdowns and extend the life of your tractor.
Following this guide will help you stay on top of your battery’s health, ensuring your tractor is ready to go whenever you need it.
Key Takeaways:
- Regularly check your battery for signs of wear, including slow starts and dim lights.
- Test your battery’s voltage with a multimeter to determine if it needs replacing.
- Follow our step-by-step guide to safely remove and install a new battery.
- Maintain your battery by cleaning terminals, checking the charge, and storing it properly during the off-season.
